

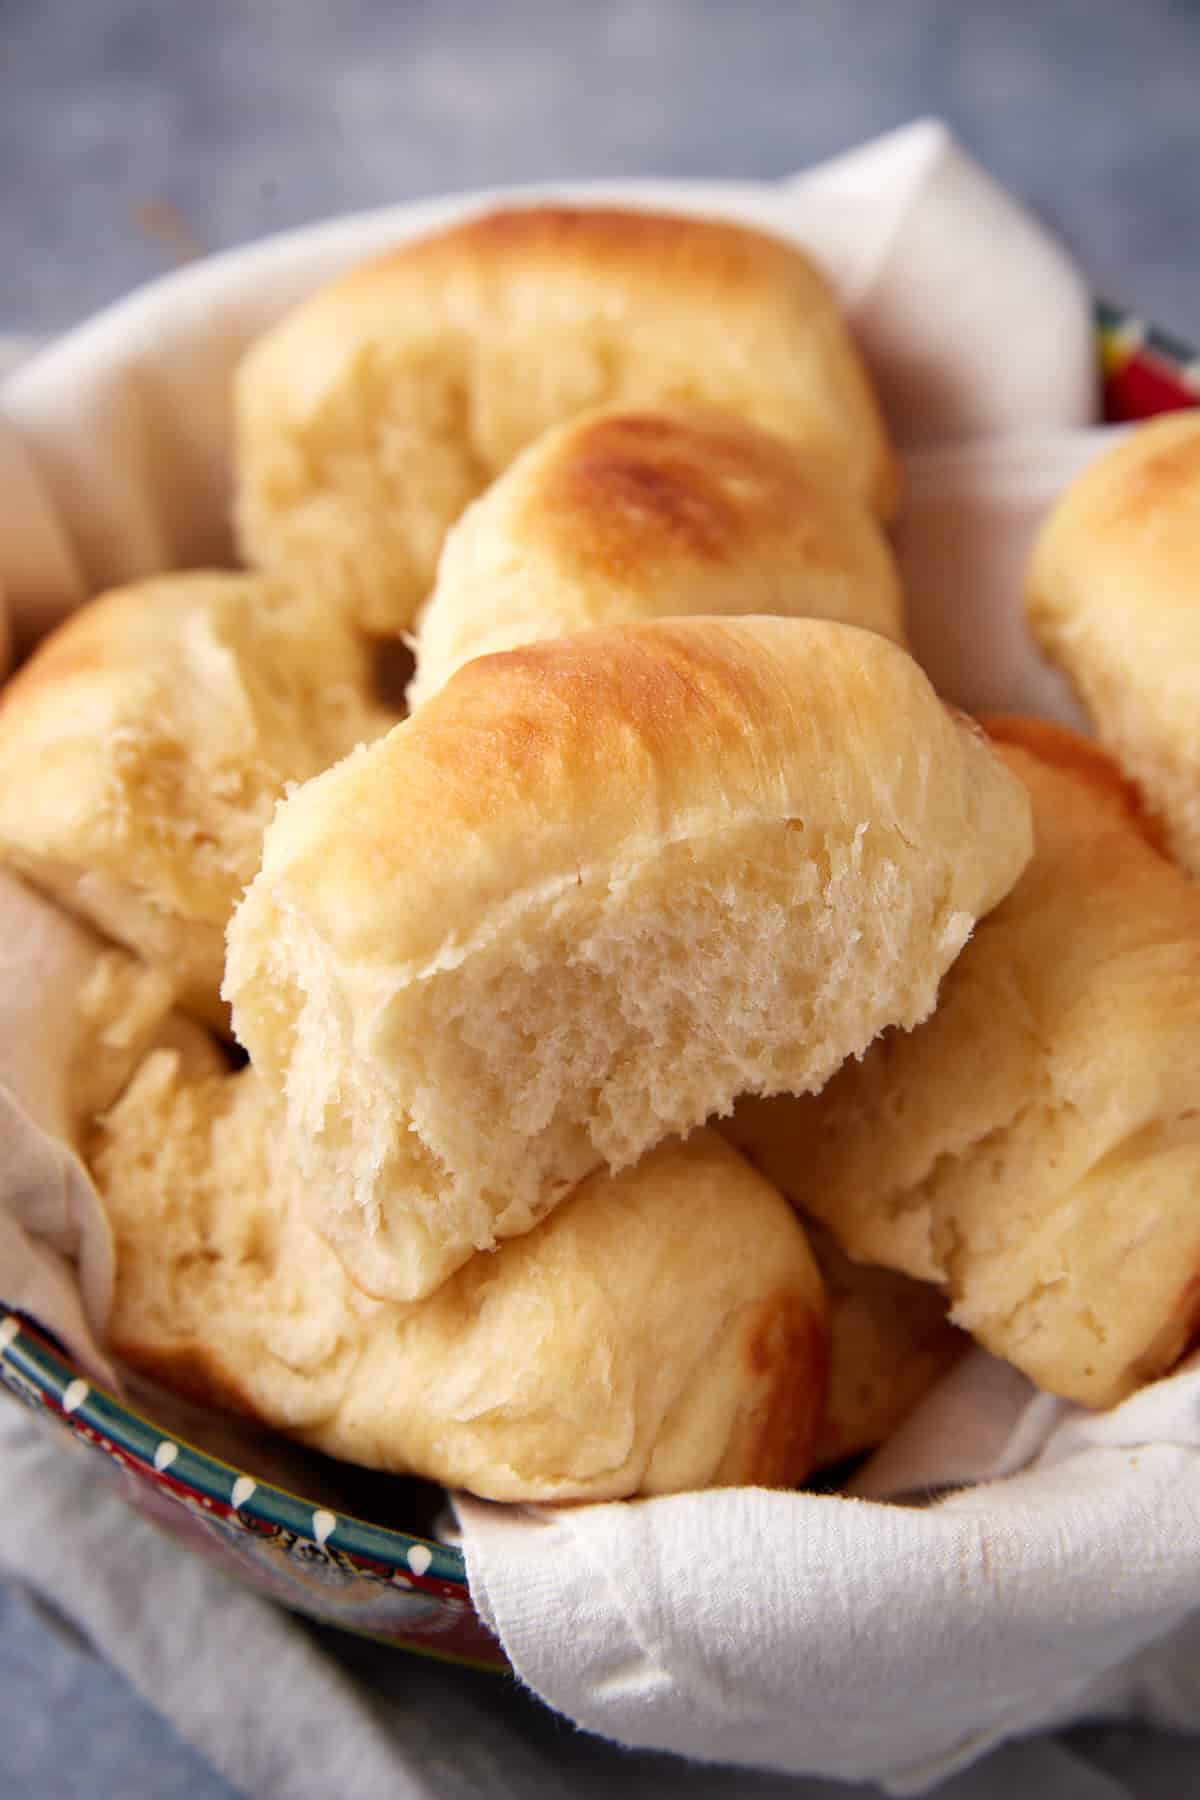
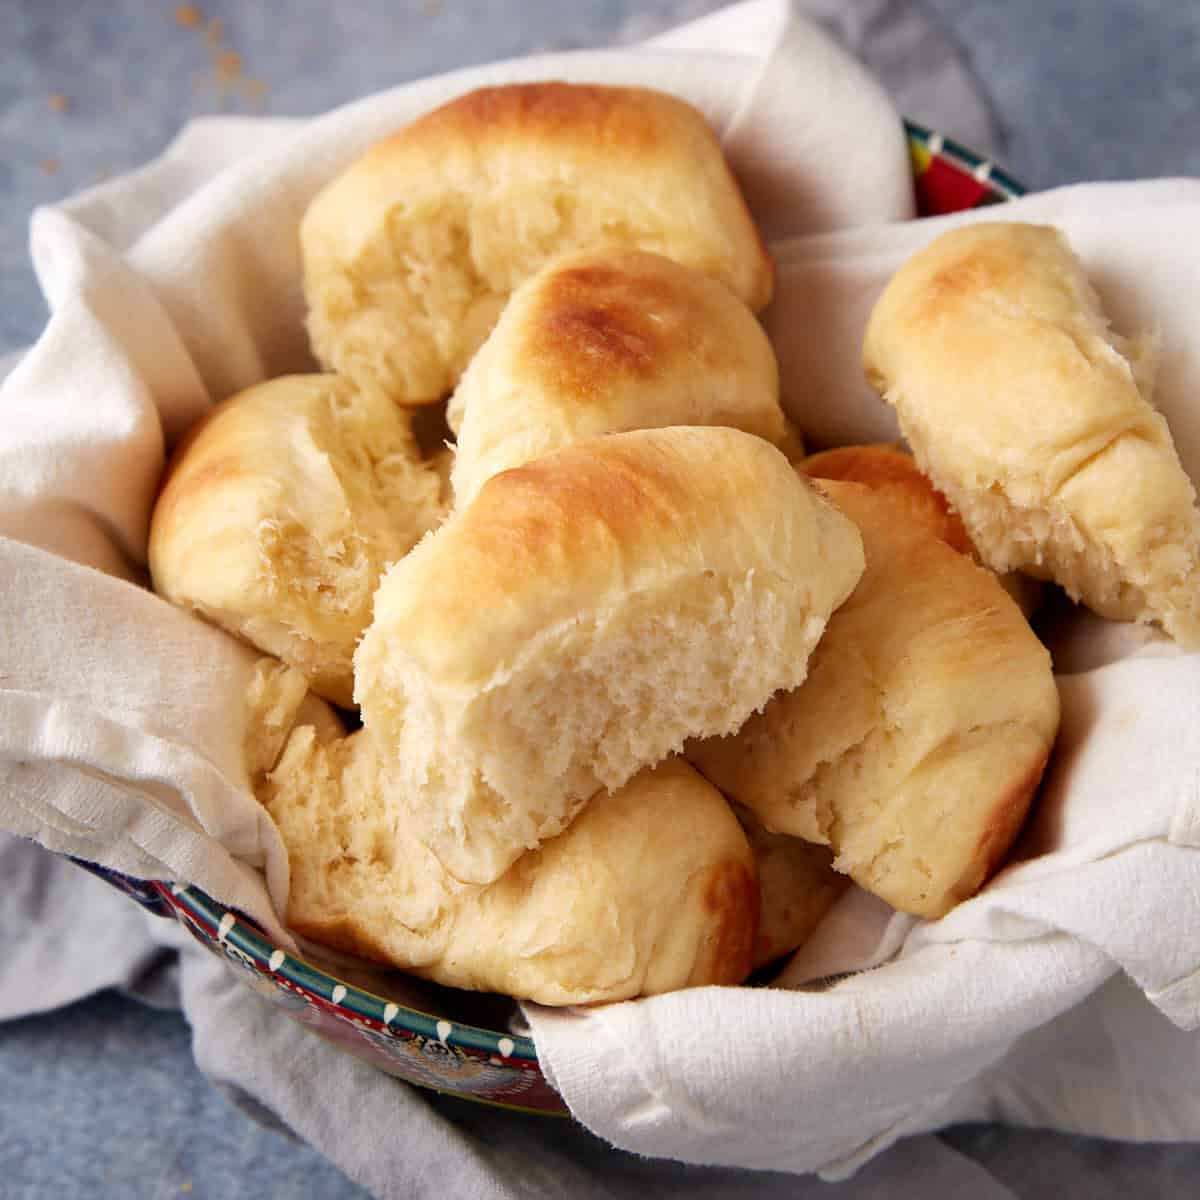
Soft, fluffy homemade dinner rolls are always worth the extra step, and this recipe proves it. Made with bread flour, whole milk, yeast, and a quick flour paste, these buttery yeast rolls bake up light and airy with a tender pull-apart center. Shaped into simple spirals instead of balls, they stay soft without turning dense, making them perfect for holiday meals, Sunday dinners, or anytime warm rolls are a must.
A Quick Look At The Recipe
- Recipe Name: Old-Fashioned Yeast Rolls with a Modern, Foolproof Method
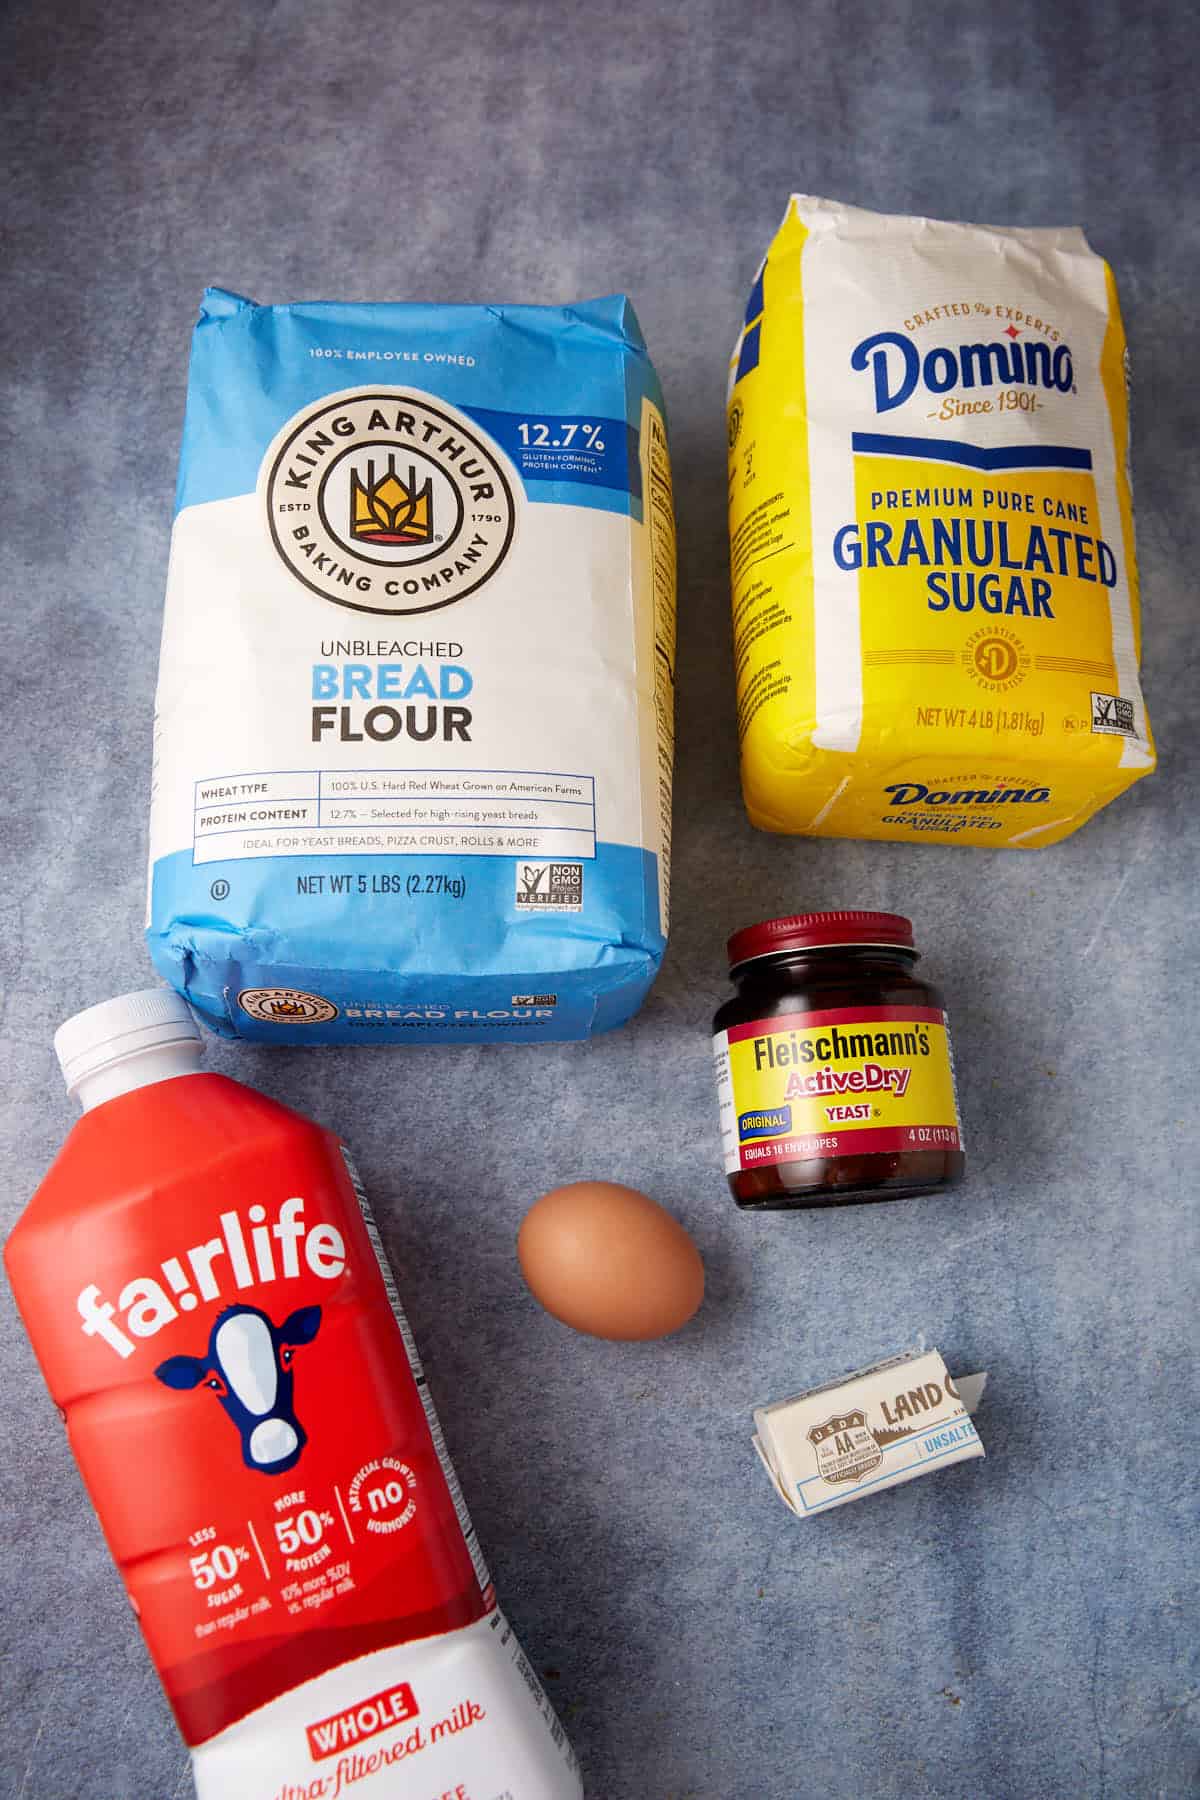
- Main Ingredients: FLOUR PASTE, water, bread flour, DOUGH, cold milk, egg, bread flour, yeast
- Why You'll Love It: Soft, fluffy homemade dinner rolls are always worth the extra step, and this recipe proves it. Made with bread flour, whole milk, yeast, and a quick flour paste, these buttery yeast rolls bake up light and airy with a tender pull-apart center. Shaped into simple spirals instead of balls, they stay soft without turning dense, making them perfect for holiday meals, Sunday dinners, or anytime warm rolls are a must.
These Yeast Rolls Will Become Your Favorite Dinner Roll
Light, fluffy, warm-from-the-oven yeast rolls are the kind of thing people talk about long after dinner ends. You know the ones, soft on the inside, golden on top, and just barely sweet. The kind that disappear before the turkey hits the table.
And here’s the trick that changed everything for me: you start with a paste.
My All-American Summer Menu 🇺🇸
FREE EMAIL BONUS: Delicious summer recipes just in time for the season
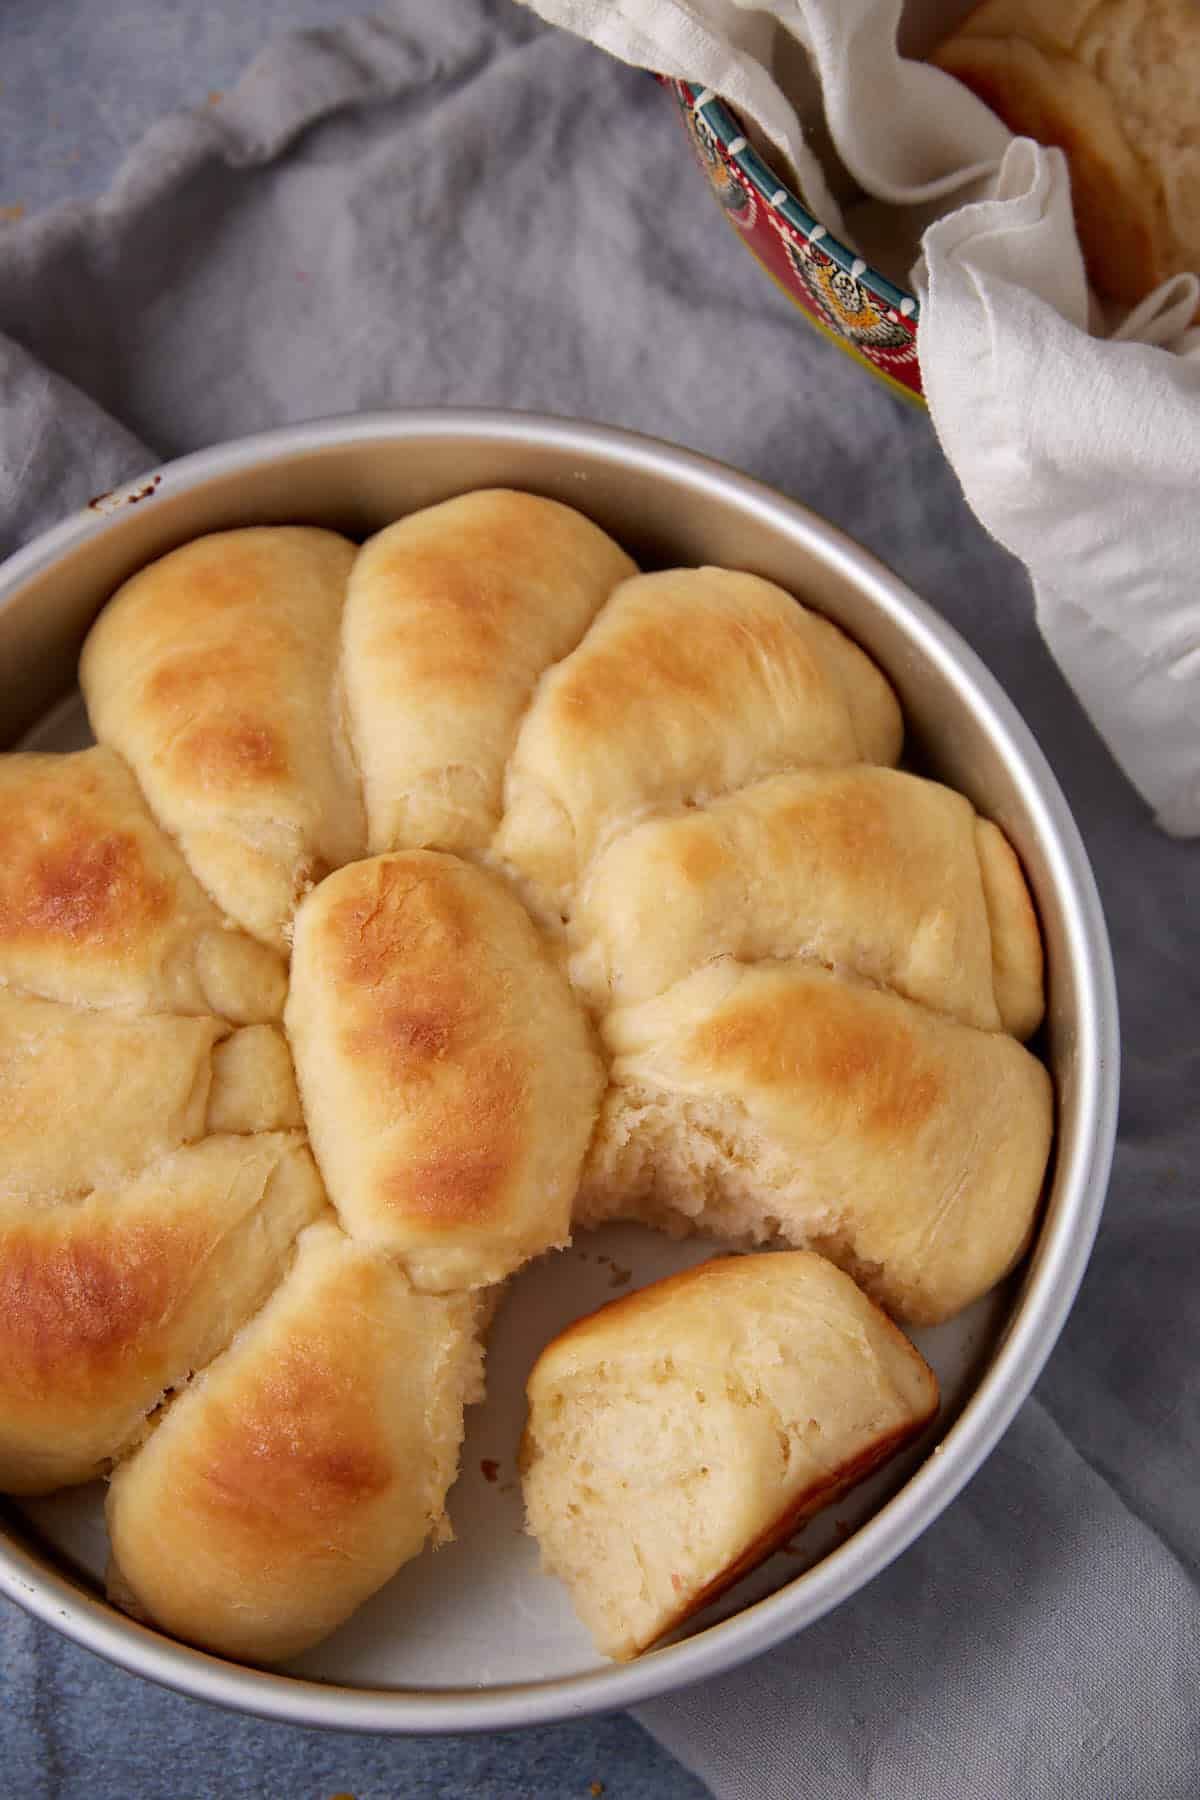
Yep, a weird little flour-water mixture that takes 60 seconds in the microwave. Then you build the dough around it. Add in bread flour for extra chew and strength, give it some love in the mixer, and when it’s ready? Roll it out, slice it into rectangles, and shape each strip into a swirl, not a ball. That rolling step right there is key. No more dense, tough rolls. These come out like clouds. But with butter.
I’ve made a lot of rolls over the years. I’ve tried ones with sour cream, some with mashed potatoes, and others with herbs. Love them all. But when I want a roll that’s so soft it practically sighs when you tear it open, I make this recipe. Every single time.
Featured reader review
“I have been a chef/pastry chef for 25ish years. I have made thousands and thousands of dinner rolls using what was ONCE my favorite recipe. I wish I could go back 25 years and use THIS recipe!”- Holly I found this recipe by chance a few years ago and it has been my “go to”ever since…despite having many other recipes. I make them almost weekly for sunday supper for my kids and I, but making some now and putting a cinnamon roll filling in before I roll them to see how that works out. thanks so much for this easy perfect fool-proof recipe!”
– Kimber
Why this method works
It sounds a little fussy—make a paste? Roll strips?—but it’s really not. Once you try it, you’ll never go back to just forming dough into balls and calling it a day. I first saw the technique on America’s Test Kitchen, and I’ll be honest, I was skeptical. But it makes the biggest difference. The paste keeps the dough super moist and fluffy, while rolling instead of shaping into rounds gives them that melt-in-your-mouth texture.
And when you take them out of the oven? Golden, warm, pillowy magic. Brush them with melted butter and you’ve basically made happiness in bread form.
Pro Tip: Yeast rolls are best served warm, but it can be hard to coordinate having warm rolls when you are making multiple dishes. The slow cooker will save the day when it comes to dinner rolls. You can keep dinner rolls warm in a slow cooker and save the oven for all of your favorite casseroles.
A few key ingredients
Here’s what really matters:
- Bread flour – more protein means more structure, which somehow leads to lighter rolls. Weird, but it works.
- Whole milk – don’t mess around with skim. This is a roll recipe, not a diet plan.
- Yeast – you can use instant or active dry. Just make sure it’s still good!
Grab the full list and step-by-step instructions down in the recipe card.
How to Make the Best Yeast Rolls With Bread Flour
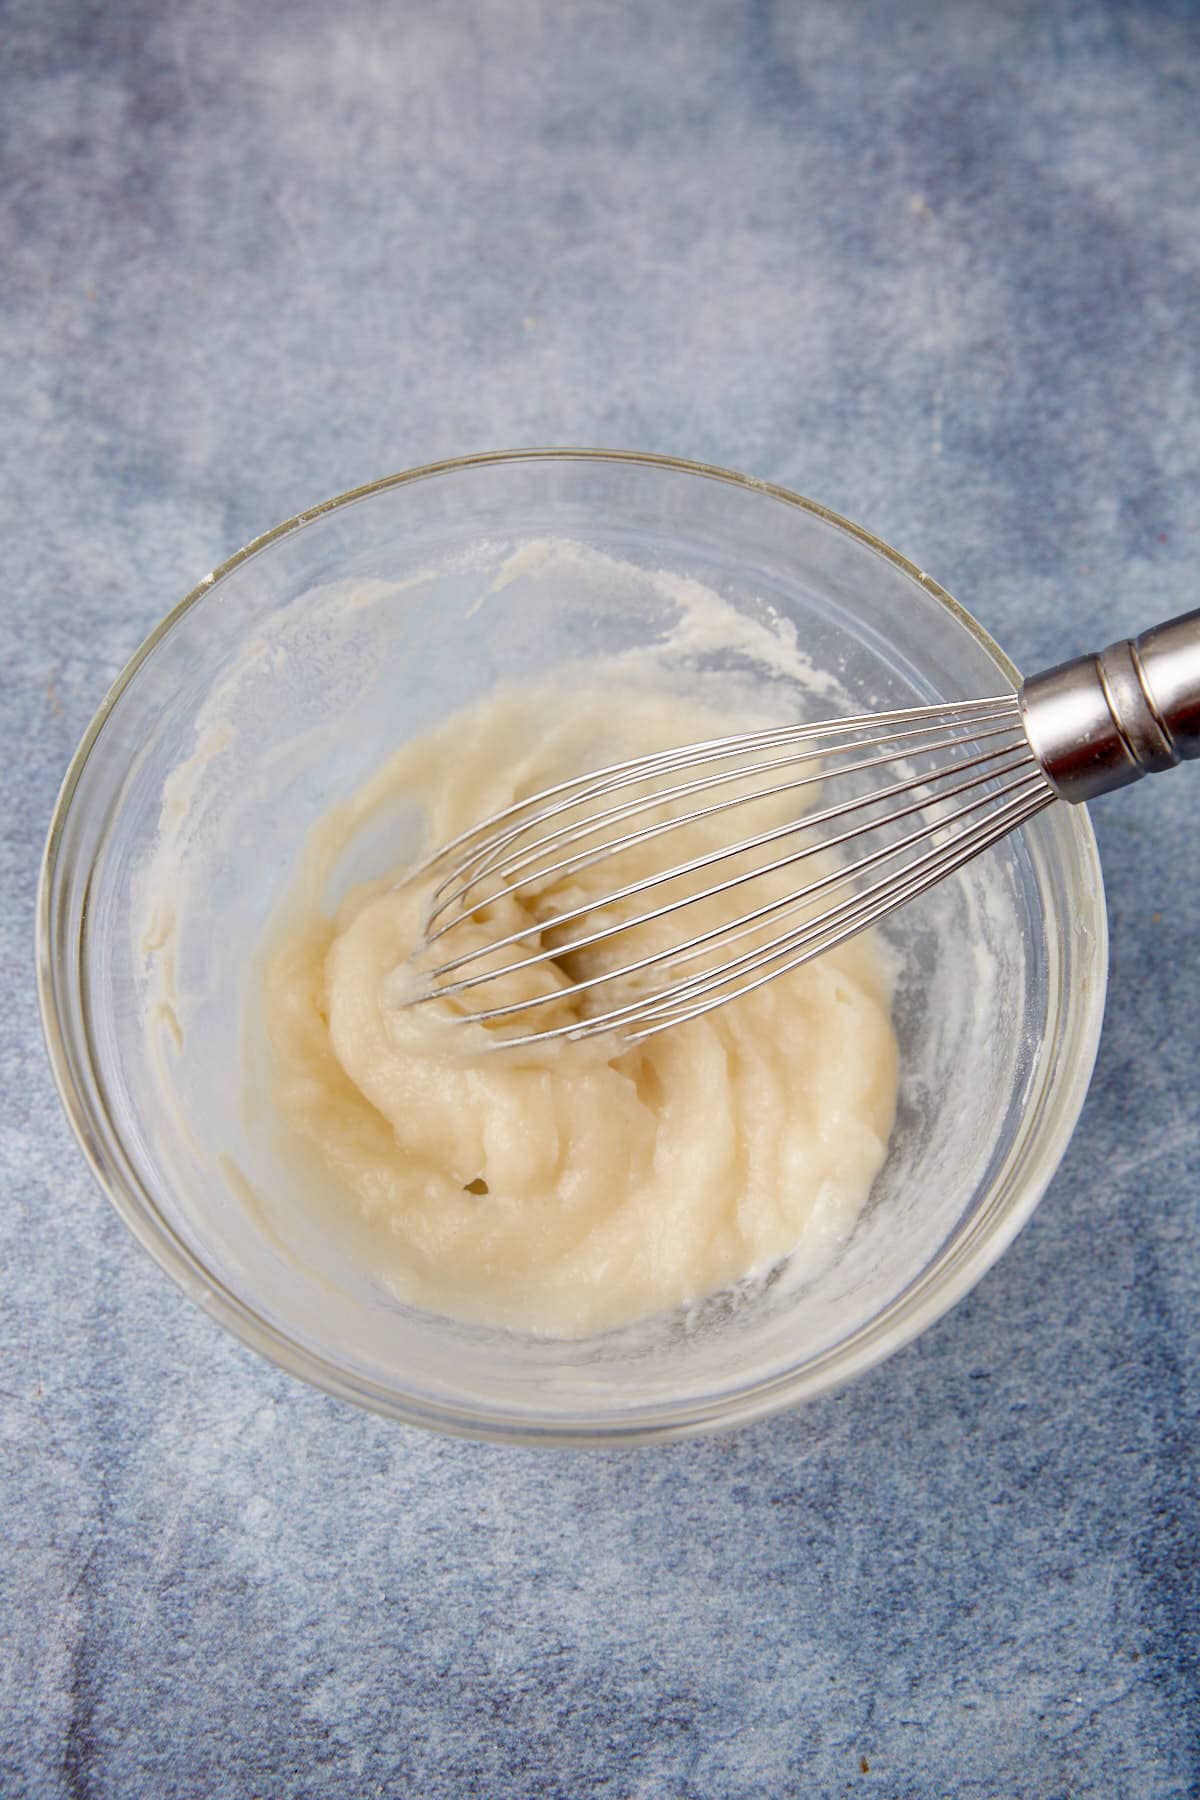
Step 1: Make a flour paste
I make a similar paste in my buttermilk dinner rolls.
Step 2: Make the dough
Let it rise for about an hour.
Step 3: Prepare the rolls


Step 4: Bake

Rolling them like this instead of in a ball yields a tender and extremely light and airy dinner roll. It only takes a minute or two more than forming them into balls, but the difference is just amazing.

A few extras to know
- Making a big meal? Keep the rolls warm in a slow cooker while you finish your favorite side dishes.
- Want to prep ahead? Make the dough, shape the rolls, then cover and refrigerate overnight. Let them sit out for 30 minutes before baking.
- Need to freeze? Once baked and cooled, stash them in an airtight container. They’ll keep for a few months in the freezer. Reheat in foil in the oven.
My go-to roll trick
If your kitchen runs cold like mine, create a warm spot by boiling water in your microwave. Set the bowl of dough inside and close the door (don’t turn it on again!). The warm, steamy air helps the dough rise beautifully.
Whether it’s a holiday spread or just Sunday dinner, these yeast rolls are always the first thing gone. Make a double batch. You’ll wish you had.

If you loved this recipe, give it a star ⭐️⭐️⭐️⭐️⭐️ rating! Also, snap a picture of your finished dish and share it with me on Instagram using the hashtag #butterandbaggage and tagging me @butterandbaggage.
Old-Fashioned Yeast Rolls with a Modern, Foolproof Method
Ingredients
- FLOUR PASTE
- ½ cup water
- 3 tablespoons bread flour
- DOUGH
- ½ cup cold milk
- 1 egg
- 2 cups bread flour
- 1 ½ teaspoons yeast
- 2 tablespoons sugar
- 1 teaspoon salt
- 4 tablespoons butter softened
- ½ tablespoon butter melted
Instructions
- PASTE:
- Start by making a paste by whisking water and flour together in a small bowl. Microwave until the mixture thickens, whisking every 15 seconds for about a minute. It should be thick but if it's too thick to stir, add a little water.
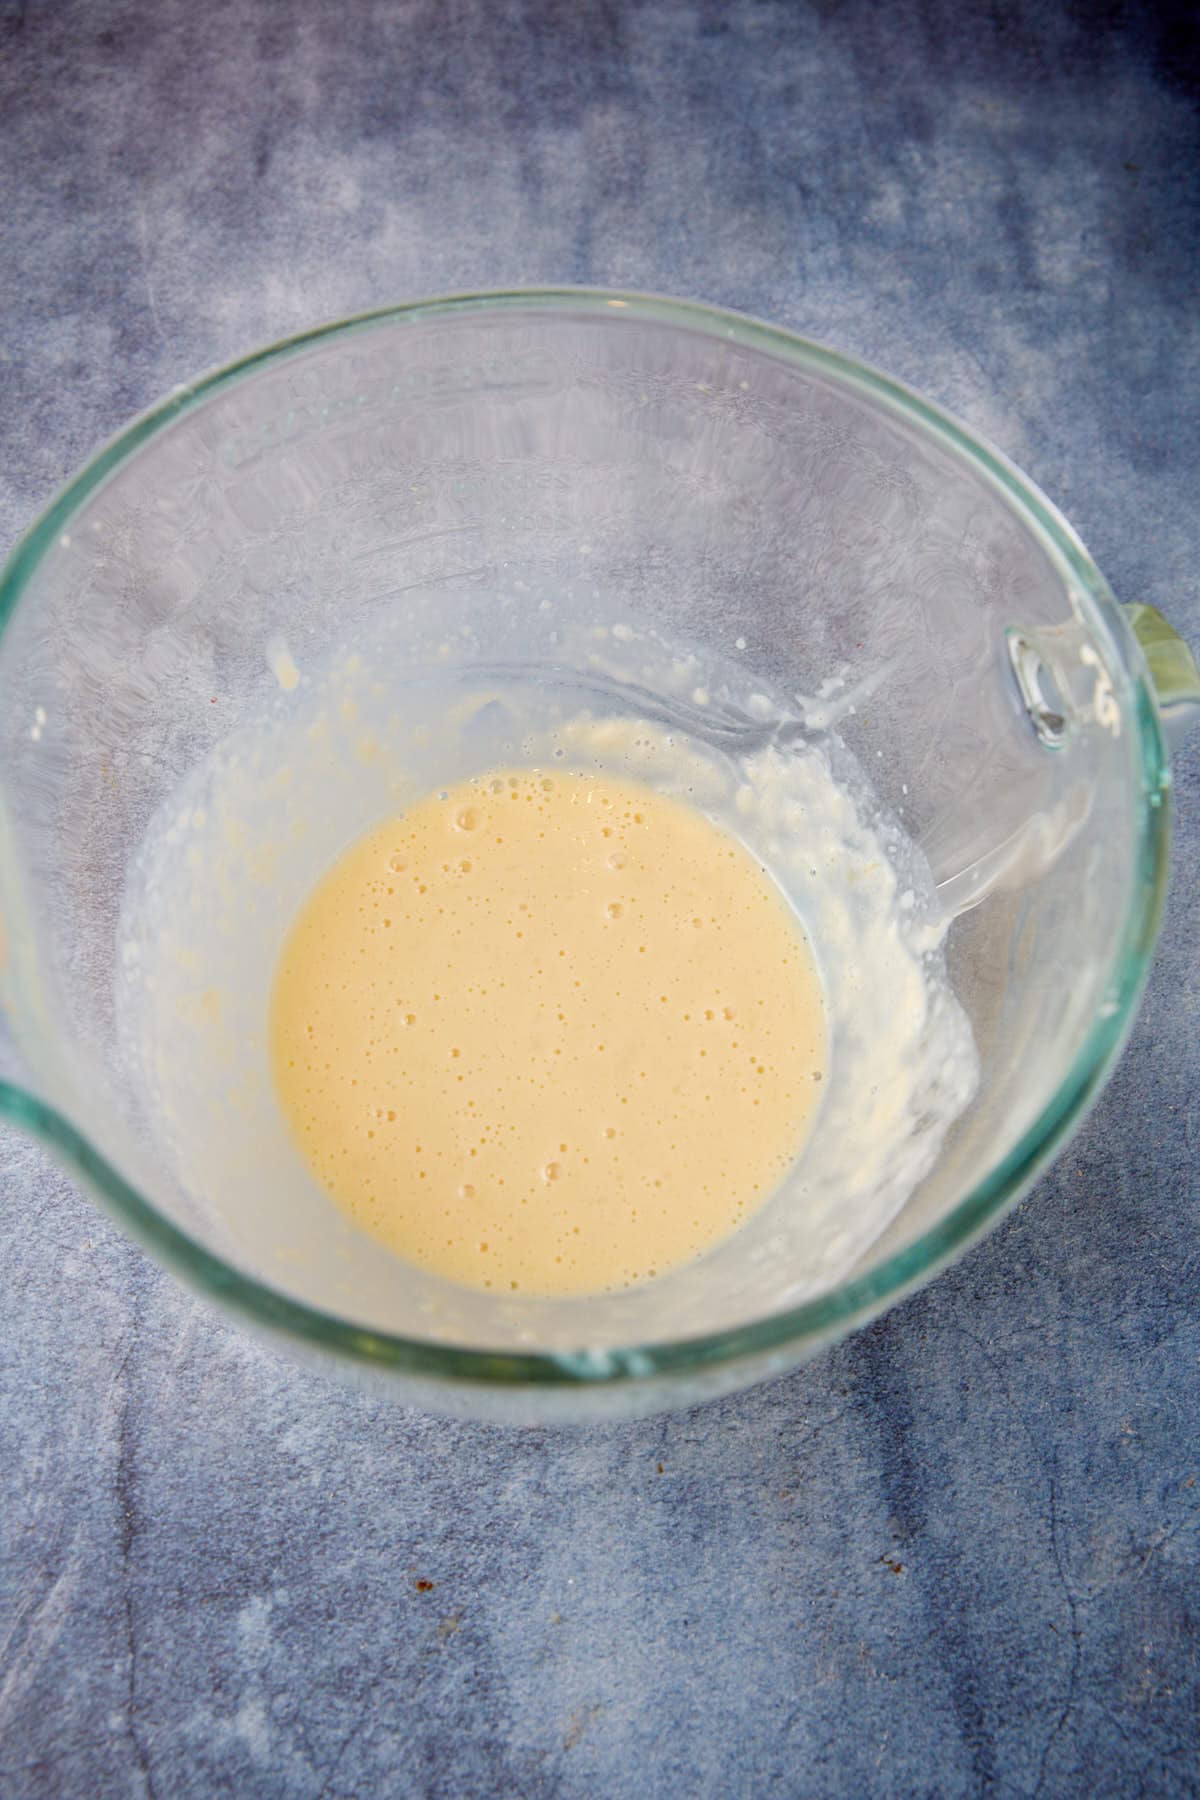
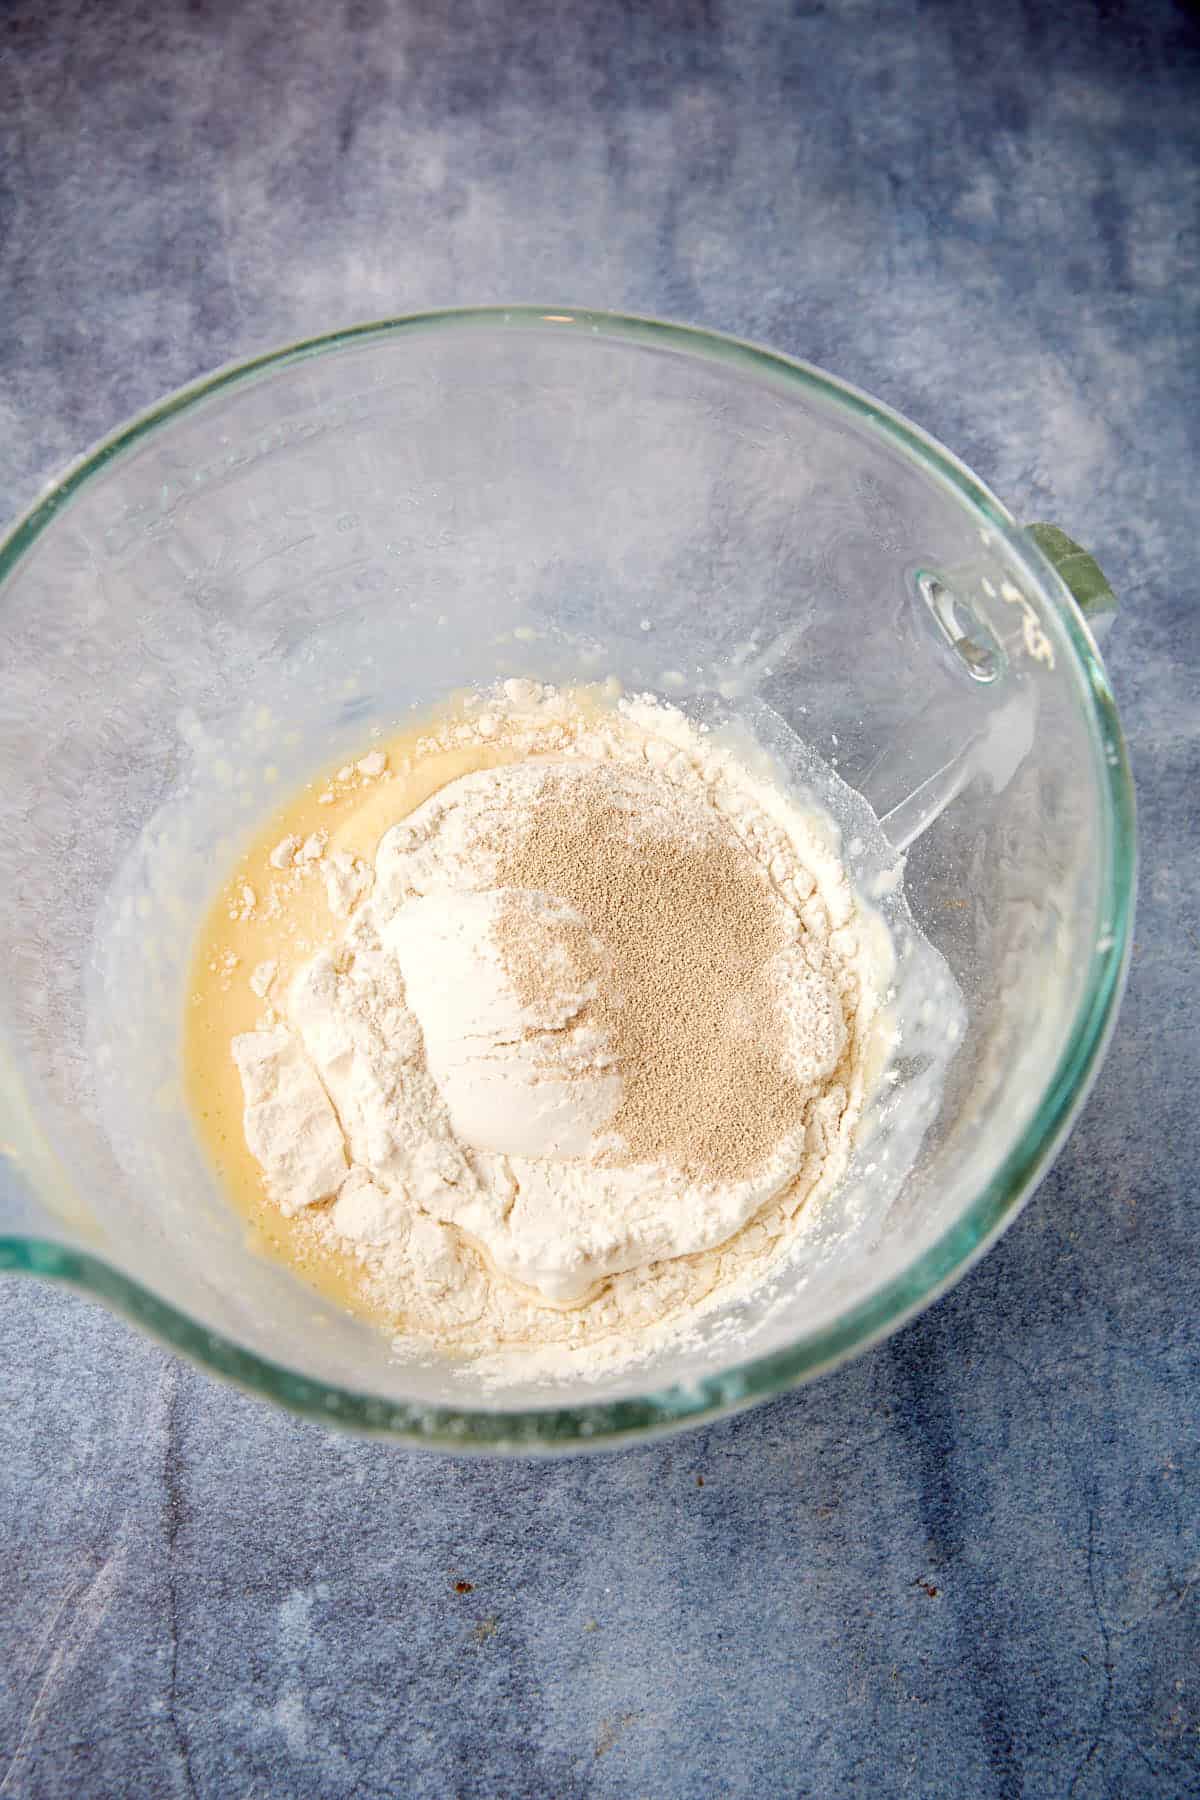
- DOUGH:
- With an electric mixer, mix the paste with the milk until it is smooth using the whisk attachment, then mix in in the egg. Add flour and yeast and mix on low speed with the paddle attachment until all the flour is incorporated, about 2 minutes. Let it rest for 15 minutes.
- Add the sugar and salt and mix on medium-low speed for 5 minutes, then add 4 tablespoons of butter, a little at a time until incorporated and continue to mix for an additional 5 minutes.
- Transfer the dough to a lightly floured surface, it will be sticky. Knead briefly to form into a ball and place in a lightly greased bowl. Cover with plastic wrap and let it rise in a warm place until doubled, about 1 hour.
- Grease a 9-inch round cake pan. Transfer the dough to a lightly floured surface and press gently to remove the air. Pat and stretch to form an 8 inch by 9 inch rectangle. Cut the dough into 4 equal strips and cut each strip into 3 equal pieces. Work with one piece at a time and press it into strip about 4 inches by 2 inches. Starting at one end roll each strip into a tight cylinder. Place seam side down in prepared pan, pointing inward. Place 10 around the pan and 2 in the center.
- Cover with plastic wrap and let rise until doubled, about 1 hour.
- Preheat oven to 375º. Bake until golden brown, 15-20 minutes. Let cool in the pan for 3 minutes and then remove and brush with melted butter and let cool slightly before serving.
Video
Barbara’s Tips + Notes
- Rising tips: To help the dough rise, heat up some water in the microwave and then add the bowl of dough to the warm microwave and shut the door, or you can heat the oven to 200º. Place the dough in the warm oven shut the door and turn off the oven.
- Make ahead tips: You can refrigerate the dough after formed into rolls. Remove from the refrigerator and let warm to room temperature for 30 minutes before baking.
- You can make these in any type of baking dish, it does not need to be a cake pan.
- You will use the paddle attachment on your mixer not the dough hook.
Nutrition
 Follow Me On SocialDid you make this recipe? Mention @ButterandBaggage or tag #ButterandBaggage
on Instagram!
Follow Me On SocialDid you make this recipe? Mention @ButterandBaggage or tag #ButterandBaggage
on Instagram!
Melissa Franzen says
I have made this recipe many times and it has always turned out great! Until I made a double batch this morning! My mixer couldn’t handle the extra weight. Also, it took more effort to incorporate ingredients and t got very tough and overworked. Change the advice about doubling the recipe, otherwise it is 5 stars.
Barbara Curry says
Thanks for that input, I have a large mixer so it’s good to know if you have a smaller mixer.
kimber says
i found this recipe by chance a few years ago and it has been my “go to”ever since…despite having many other recipes. i make them almost weekly for sunday supper for my kids and i, but making some now and putting a cinnamon roll filling in before i roll them to see how that works out. thanks so much for this easy perfect fool-proof recipe! -kimber and kids
Barbara Curry says
Kimber, that was just the nicest comment. Thank you for taking the time and adding the 5 stars. These are also my “go to” rolls. Let me know how they work as a cinnamon roll.
Bill Plogman says
Thanks so much for this recipe and many others . I have tried several of your recipes
they have all worked out great . Hope you have a Happy New Year. Bill
Barbara Curry says
Thank you Bill, that was so nice.
Amica says
O.M.G. I signed up to make rolls for Thanksgiving and did a trial run yesterday. They turned out PERFECT. I avoid baking with yeast because it intimidates me (I always feel like I do something wrong). But, these were so simple and so soft and chewy and I wish I never made them.
Barbara Curry says
I’m so glad you tried them, cooking with yeast is easier than people think. Thanks for leaving a review, this made my day!
Donavan says
I saw your recipe and it was different than most I have seen and tried so I thought Why not try this Has a good vibe on this and it turned out Best Yeast rolls I have ever made bar none! Extremely fluffy / soft inside came out exactly as yours !I did do one thing extra that was mention by a guy who was a baker for 25 years . He suggested to put butter on the dough before you roll it and that sounded like a fantastic idea !It was an excellent idea turned out really soft and buttery inside plus the butter brushed on the outside made these rolls a 10 out of 10 Absolutely the best rolls I have ever made !!
Barbara Curry says
Wow, thanks for that glowing review! I bet the added butter made them even better.
Tameeka Gilchrist says
I’ve made this recipe 4-5 thousand times. Ok maybe not that many but close. This HITS EVERY TIME. I am so grateful to you for perfecting and sharing this. My family and friends thank you too!
Barbara Curry says
Tameeka, I love getting these type of comments, it has made my day! Thanks
Cynthia Atwood says
Can’t wait to try this recipe ! Years ago I had a favorite refrigerator rolls recipe. (Store dough in Tupperware, pinch off for rolls needed, return rest of dough to fridge. Recipe made MANY rolls.)
My question: I do not own a paddle, just a hook and a whisk for my large Sunbeam mixer. What would you recommend that I use…?
Thank you for ALL of your recipes. I love your site ! Down-to-earth and delicious recipes and tips.
Cynthia
Barbara Curry says
You can try the whisk and if the dough is too thick for it use the paddle. You’re not really kneading the dough, just mixing it.
Cynthia Atwood says
Thank you so much for taking the time to reply, and thank you for the suggestion !
Cynthia
Michele says
These rolls are definitely the lightest I have ever made! Easy to make and results are so good. Only change I made was to shape them a bit more round after rolling them up as they were too tubular to me (maybe I misinterpreted the shaping). These will be a hit on Thanksgiving this year! (I had to make a trial run a few days before).
Barbara Curry says
Great tip for reshaping them. Thanks so much for leaving a review.
Stacy says
OMG!!! These were fantastic and a SERIOUS hit with everyone and Thanksgiving dinner!
I agree, great recipe and definitely a keeper! Thank you so much!
Barbara Curry says
So glad you loved them, they’re the rolls I always have for Thanksgiving.
Kim says
OMG….I made these for Thanksgiving and I’m in love ❤️ I followed the recipe but it was a little sticky when forming the balls but SUPER DELICIOUS!! The rating should be higher!! Can I freeze them raw? Or cook them first?
Barbara Curry says
I’ve never tried freezing them raw, I’ll try it next time I make them. To be safe, I would freeze them cooked, let them come to room temperature and warm in a slow cooker or covered in the oven.