

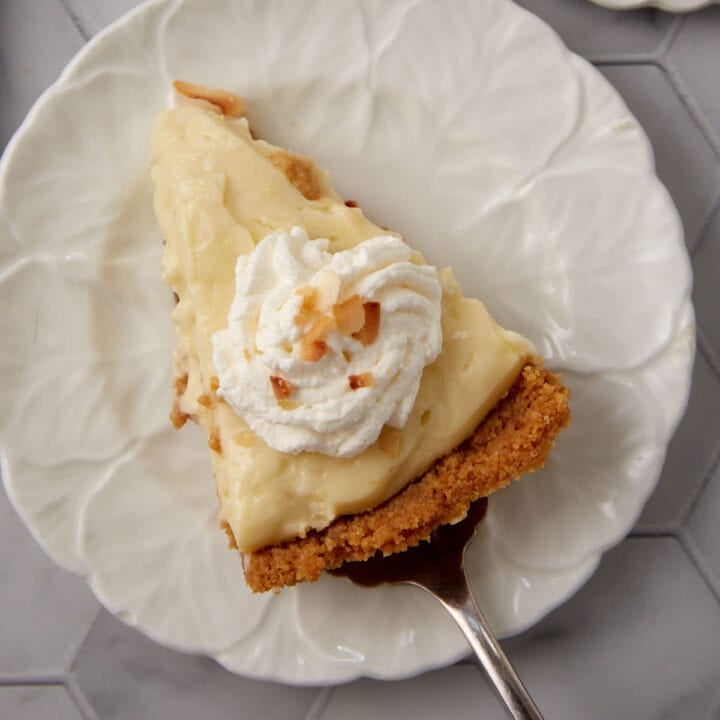
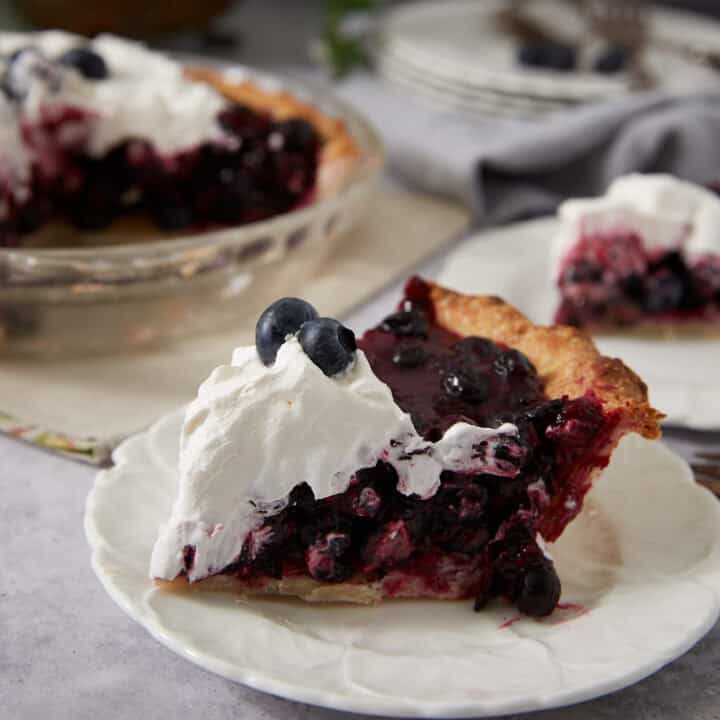
There’s nothing like sweet whipped cream on top of a coconut cream pie or piped onto the top of a sweet potato pie, but whipped cream breaks down fairly quickly making it hard to decorate your gorgeous desserts. Don’t let your whipped cream look droopy – use this hack to learn how to stabilize whipped cream, and it’ll last for days in the refrigerator without becoming runny or watery.
Whipped cream is one of life’s greatest pleasures, isn’t it? Whether it’s the topping on a peach cake, in a pumpkin parfait, or liberally scooped onto a piece of pecan pie, it’s really the perfect addition to your favorite dessert. But it’s hard to make ahead of time because it deflates quickly and loses its airy texture.
And if your kitchen is hot or you want to serve a dessert outside? It will melt faster than you can say, “whipped cream!”
Have you ever wanted to pipe a beautiful swirl of whipped cream, you better be fast because your beautiful flower is not going to last long.
This hack for making stabilized whipped cream fixes all of those issues. ‘Stable’ whipped cream doesn’t melt very easily and keeps it shape so you can make it in advance and store it in the fridge. (In my last experiment, it kept it’s shape for 10 days!) It also keeps it from absorbing into your cake or other desserts so you can use it as a frosting or topping.
My All-American Summer Menu 🇺🇸
FREE EMAIL BONUS: Delicious summer recipes just in time for the season
Why You’ll Love This Hack for Making Stabilized Whipped Cream
- It holds up for a long time. Stabilized whipped cream can last days in the refrigerator without collapsing or separating. It’s great for decorating cakes and pies or as a homemade alternative to canned whipped cream.
- It is just as easy to make. There are a few extra steps to making thickened whipped cream, but it’s a straightforward process that doesn’t take much effort at all.
- The flavor is not affected. The whipped cream will still taste just like the sweet whipped cream you know and love. The texture will be slightly stiffer than regular whipped cream, but it is still light and fluffy. Best of both worlds!
Ways to use a more stable whipped cream
Whipped cream is made by beating air into heavy cream. It can easily collapse and melt in hot weather, and the fat and water from the cream can separate if you store it in the refrigerator. Using stabilized whipped cream allows it to last much longer without collapsing.
In addition, stabilized whip cream has a better texture for piping if you plan to decorate a pie, top cupcakes, or just want to make your whipped cream ahead of time.
What You’ll Need

- Unflavored Gelatin – you only need a teaspoon
- Heavy cream
- Powdered sugar – you can use regular sugar put I prefer the smooth texture you get with powdered sugar
- Vanilla
How to Stabilize Whipped Cream
Step 1: Dissolve the gelatin.
Add water to a small bowl and sprinkle the gelatin over the water. Allow it to sit for about 2 minutes. This step is called blooming and helps make sure the gelatin is thoroughly dissolved.

Step 2: Heat the gelatin.
Place the bowl of gelatin in the microwave and cook on high for 5-10 seconds. Remove and let cool while you beat the cream.

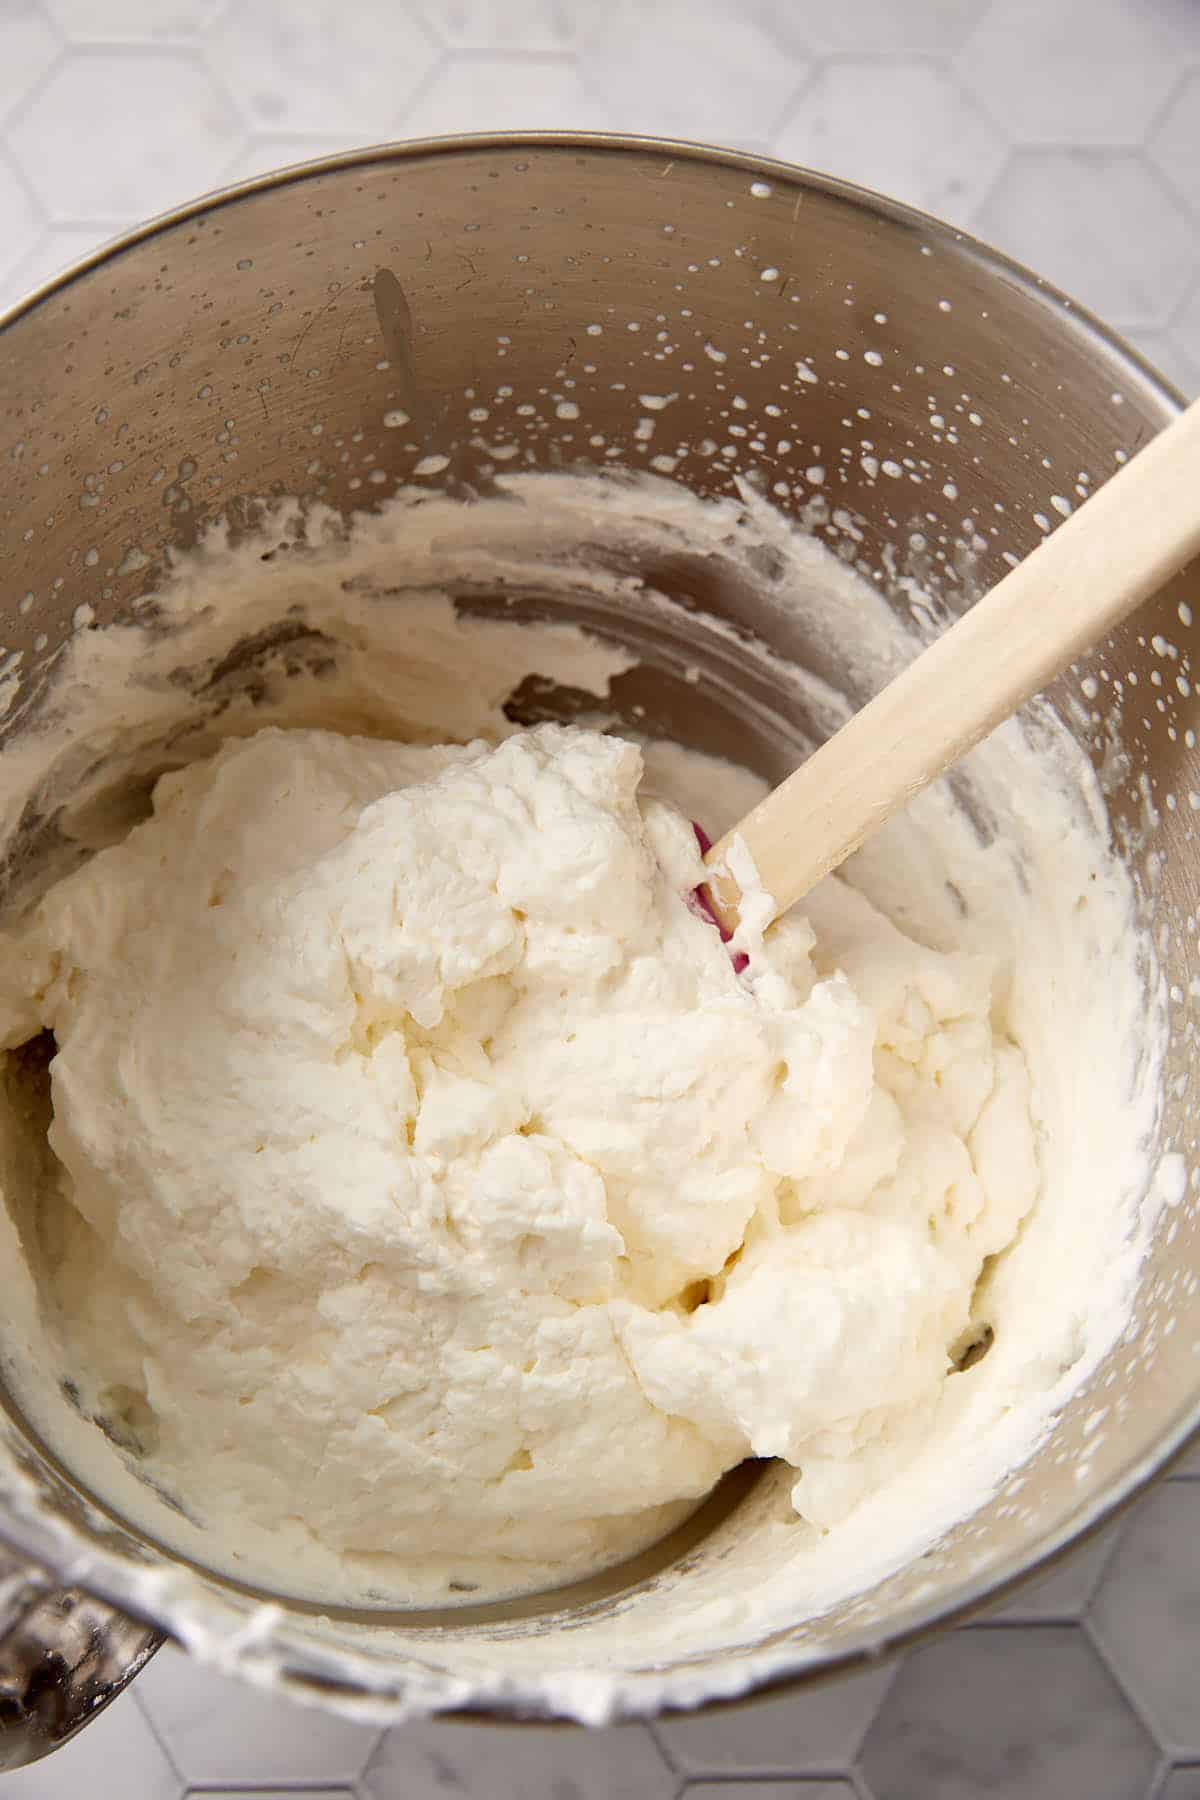
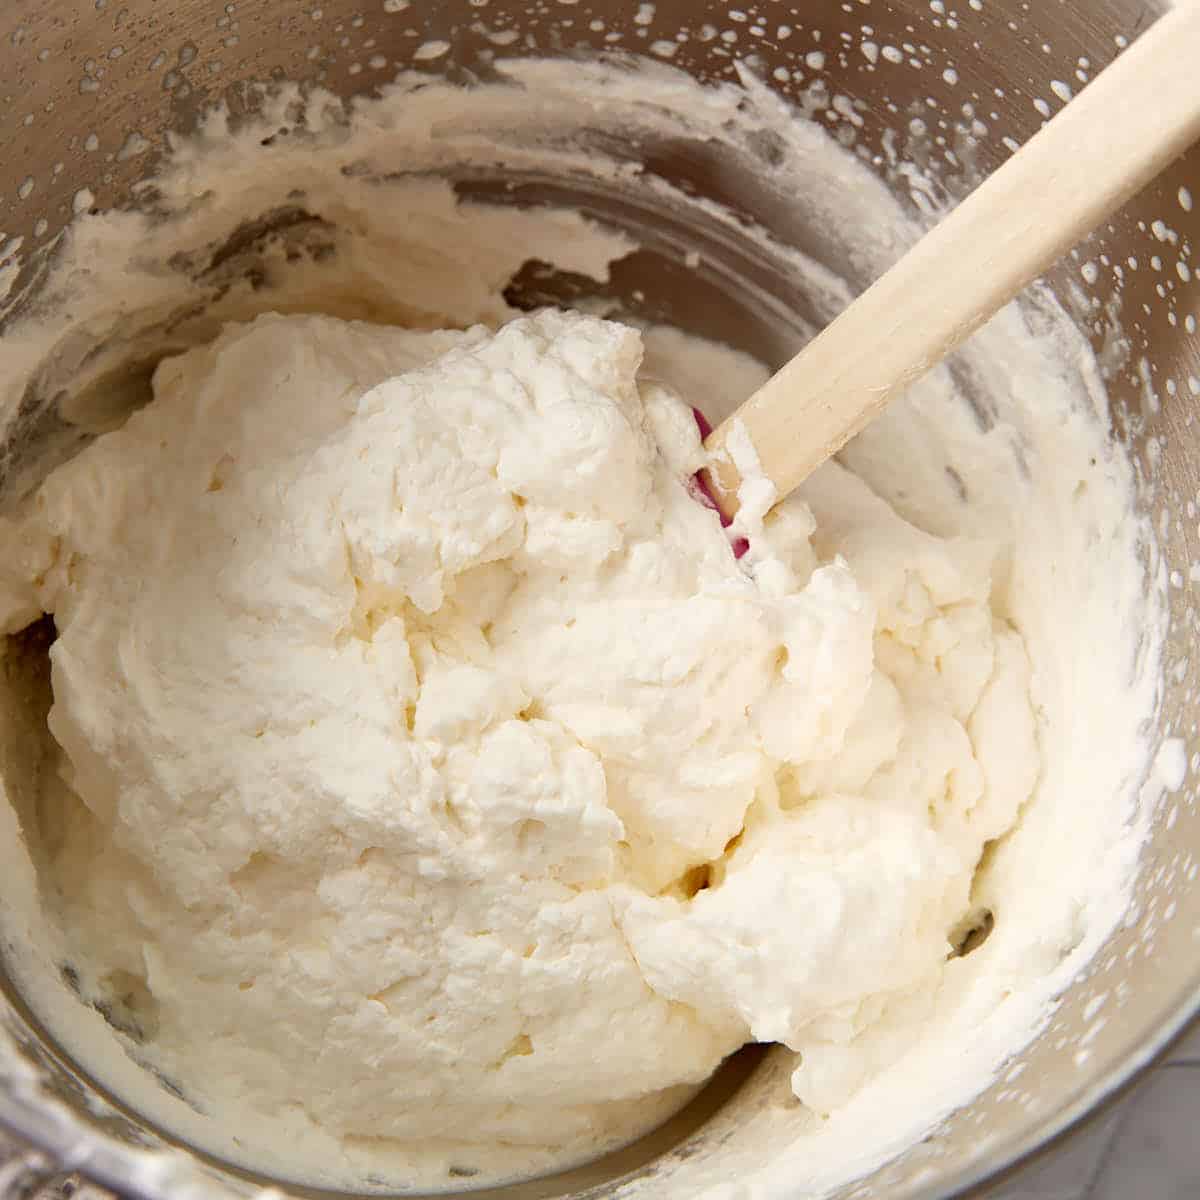
Step 3: Make the whipped cream.
With an electric mixer or hand held mixer, beat the cream, powdered sugar and vanilla until it just starts to thicken. Slowly drizzle the cooled gelatin mixture into the bowl with the mixer running and beat until stiff peaks form.

A Few Recipe Notes
- To easily fill a piping bag, place it into a pint glass and fold the edge over. Fill the piping bag with a rubber spatula, and you have a full piping bag of whipped cream without the mess.
- Don’t overmix your whipped cream. When your mixture gets thick and peaks form, stop beating!
- Make sure the gelatin has cooled and is not hot when you add it to the cream,

How to Store Whipped Cream
Stabilized whipped cream will retain its shape in the refrigerator for over a week. For flavor purposes, I would suggest using it within 3-5 days. Keep it sealed in an airtight container,or in a bowl tightly covered with plastic wrap.
If it is the topping for a pie, it will stay thick for about 3-5 days.
Why did my whipped cream separate?
When you overmix cream, you cause the milk fats and the water in the cream to separate and you end up with butter. Unfortunately, you can’t ‘fix’ your whipped cream and you’ll have to start over. Stop beating when soft peaks form.
Ways to Use Stabilized Whipped Cream

If you loved this recipe, give it a star ⭐️⭐️⭐️⭐️⭐️ rating! Also, snap a picture of your finished dish and share it with me on Instagram using the hashtag #butterandbaggage and tagging me @butterandbaggage.
How to Stabilize Whipped Cream
Ingredients
- 1 tablespoon plus 1 teaspoon water
- 1 teaspoon powdered unflavored gelatin
- 1 cup heavy cream
- ¼ cup powdered sugar
- ½ teaspoon vanilla
Instructions
- Add water to a small bowl and sprinkle the gelatin over the water. Allow it to sit for about 2 minutes.
- Place the bowl of gelatin in the microwave and cook on high for 5-10 seconds. Remove and let cool while you beat the cream. It should be runny.
- With an electric mixer or hand held, beat the cream, powdered sugar and vanilla until it just starts to thicken. Slowly drizzle the cooled gelatin mixture into the bowl with the mixer running and beat until stiff peaks form.
Barbara’s Tips + Notes
- Make sure the gelatin has cooled before adding to the whipped cream.
 Follow Me On SocialDid you make this recipe? Mention @ButterandBaggage or tag #ButterandBaggage
on Instagram!
Follow Me On SocialDid you make this recipe? Mention @ButterandBaggage or tag #ButterandBaggage
on Instagram!
Chey505 says
Excellent hack! I’ve always been hesitant to use gelatin, thinking …. I don’t know…. my recipe will turn into a gelatinous blob? Gelatin, like using yeast, for me, has always been intimidating. I have no explanation as to why. This is the most helpful recipe/hack EVER!! Of course, I believe I’ve extolled the same about …. oh, 16 times before! 🙂 But, seriously, I will think of you gratefully each time I make whipped cream – which is often. Thank you! I truly enjoy your Butter & Baggage email notifications and the site!
Barbara Curry says
I was blown away when I discovered this, now I can decorate pies a day ahead of time and know that the whipped cream will still look great. I left the leftover whipped cream in a bowl in the fridge and after 10 days it still looked the same. I’m so glad you like the site, let me know if there are any recipes you would like me to add, I’m always looking for ideas. Thanks for the 5 star rating!!