

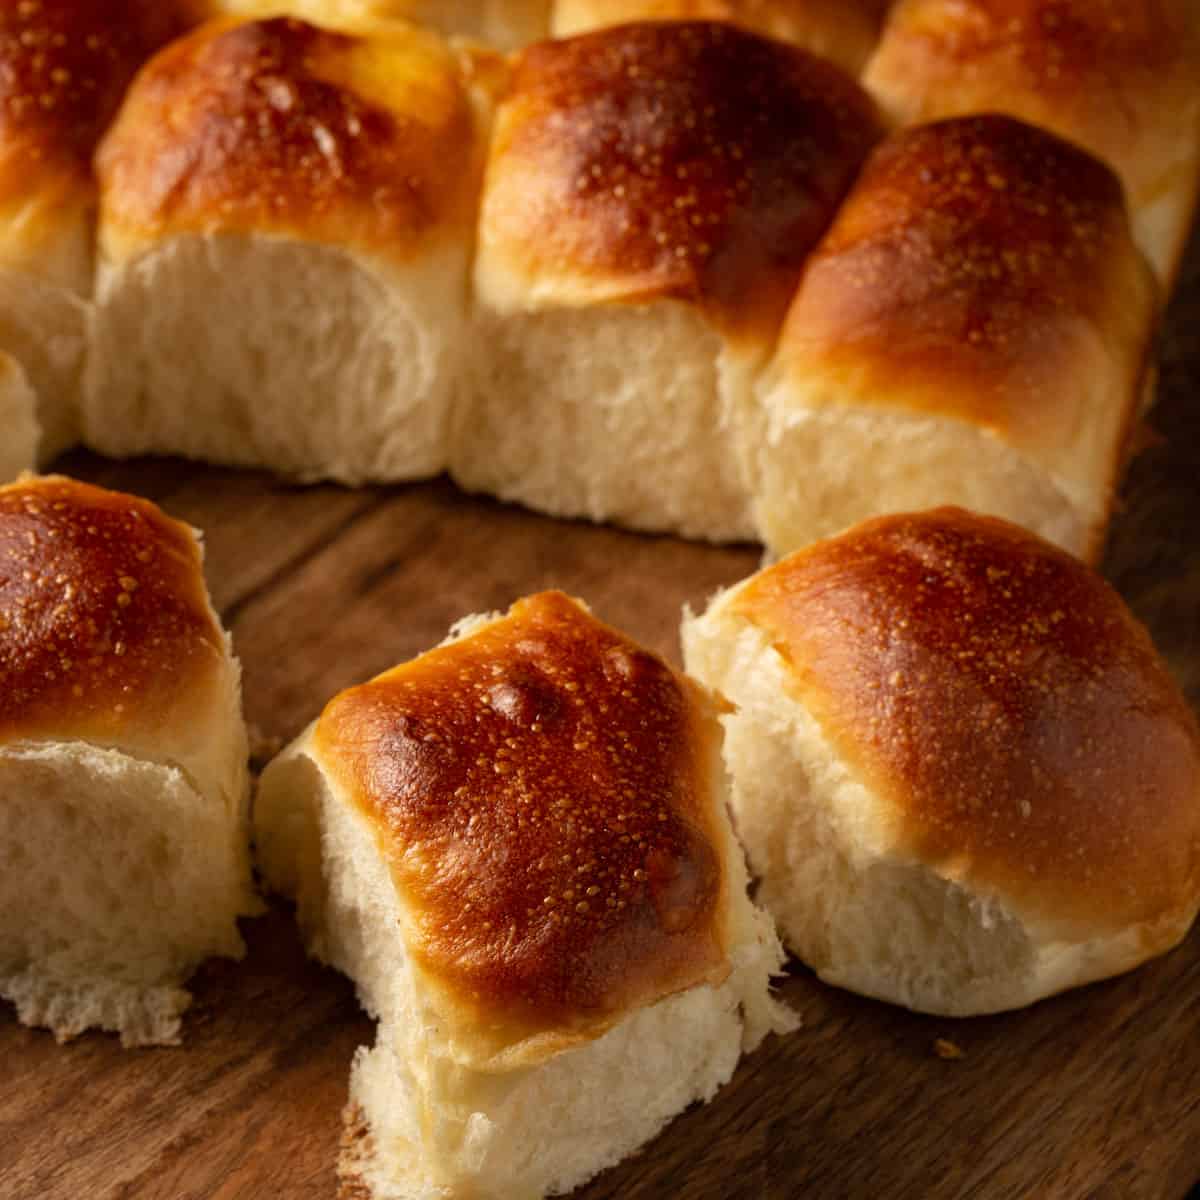
Challah rolls are sturdier yeast rolls that still manage to be light and fluffy. Made with an enriched dough that bakes to a beautiful golden color. Great for sliders or all by themselves.

Challah Dinner Rolls that are Perfect for Sliders
I’ve experimented with lots of dinner rolls over the years but never attempted challah. It’s one of my favorites but I generally purchase one of those beautiful braids from the bakery.
The first time I made these, it was really cold outside and my yeast didn’t look that happy, and the dough was sticky. But they still turned out beautiful that time and every time since, light and airy and somehow still substantial. They are my go to bread for pulled pork sliders or buns for bbq beef sliders, but they also are delicious as simply dinner rolls.

My All-American Summer Menu 🇺🇸
FREE EMAIL BONUS: Delicious summer recipes just in time for the season
All of my other yeast roll recipes have butter and milk or sour cream in them, which gives them that soft rich taste. Challah buns, on the other hand, are enriched with eggs but have no dairy, just oil. The oil is what makes them more substantial than other yeast rolls. They do need two rises so plan ahead.
These Rolls are Amazing
- These rolls will not fall apart which makes them great for sliders or sandwiches. They are hearty but not heavy!
- They are dairy-free.
- They look beautiful.
- You can make them into a knot for a gorgeous presentation. Use the technique I demonstrate in my sour cream rolls for making a knot.

Just a Few Ingredients
- Active dry yeast – this helps your bread grow light and into the beautiful shape you want, you can also use instant yeast.
- Bread flour – there’s a higher protein content in bread flour, giving the bread more gluten and texture.
- Eggs, sugar, flour, salt
Anyone Can Make Challah Rolls
Step : Proof the yeast

Step 2: Combine the liquids
In a medium bowl, whisk together warm water, oil, an egg and an egg yolk, and a little sugar.

Step 3: Knead & Rise
In the large bowl of an electric mixer, whisk together the flours and salt. Add the yeast mixture and the liquid ingredients to the flour mixture. Using the dough hook of the mixer, mix for a couple of minutes and then let it rest for 10 minutes before kneading it some more.


Step 4: Roll and let rise
Cut the dough into 18 equal pieces. Shape each roll tightly into a round ball and place the rolls side by side, slightly touching in a baking pan and let it rise for about an hour.


Step 5: Bake
Gently brush the tops and sides of each roll with an egg wash to give it that distinctive shine and golden color and bake.
Enjoy!

If you loved this recipe, give it a star ⭐️⭐️⭐️⭐️⭐️ rating! Also, snap a picture of your finished dish and share it with me on Instagram using the hashtag #butterandbaggage and tagging me @butterandbaggage.
Challah Rolls – Great for Sliders
Equipment
Ingredients
- 1½ teaspoons active dry yeast
- 1 ¼ cup warm water divided
- pinch sugar
- 4 tablespoons canola oil
- 1 egg
- 1 egg yolk
- 3 tablespoons sugar
- 1 teaspoon sugar
- 2 ½ cups bread flour
- 1 cup all-purpose flour
- 1 tablespoon salt
- 1 egg For egg wash
Instructions
- In a glass measuring cup, add yeast to a ¼ cup of warm water along with a pinch of sugar. Let stand for 3 minutes until it is foamy. If it is not foamy, throw it our and start again.
- In a medium bowl, whisk together 1 cup warm water, oil, egg, egg yolk, and sugar.
- In the bowl of an electric stand mixer, whisk together the flours and salt. Add the yeast mixture and the liquid ingredients to the flour mixture. Using the dough hook of the mixer, mix on low speed to bring the ingredients together, then switch to medium speed to knead for 5 minutes.
- Turn off the mixer and let rest for 10 minutes, then mix again at medium-high speed for 1-2 minutes. The dough should not pull away completely from the sides of the bowl, but will be a little sticky.
- Put dough in a lightly oiled bowl and turn the dough to coat it. Cover with plastic wrap and place in a warm place for 11/2 to 2 hours, or until doubled. Punch down to remove the air bubbles.
- Lightly oil the sides of a 9 x 13 pan. Cut the dough into 18 equal pieces. Shape each roll tightly into a round ball and place the rolls side by side, slightly touching, 4 across and 5 down the length of the pan, with only 2 rolls in the last row. Cover with plastic wrap sprayed with oil. Let rise for 45 to 60 minutes or until nearly doubled in volume.
- About 20 minutes before the dough is ready, preheat the oven to 425º. In a small bowl, mix 1 egg with 1 teaspoon of water to make an egg wash. Gently brush the tops and sides of each roll. Bake for 10 minutes, rotate the pan and reduce the oven temperature to 350º. Continue baking for 5 minutes. Watch them carefully as you don’t want them to get too brown.
Barbara’s Tips + Notes
- For a warm place for the dough to rise, boil a glass container of water in the microwave. Add the covered dough to the warm and humid microwave and shut the door.
- These rolls are perfect on their own or as sandwich and hamburger buns!
- The dough will be a little stickier than traditional yeast dough.
- All ovens heat differently so remove them when they are golden brown.
Nutrition
 Follow Me On SocialDid you make this recipe? Mention @ButterandBaggage or tag #ButterandBaggage
on Instagram!
Follow Me On SocialDid you make this recipe? Mention @ButterandBaggage or tag #ButterandBaggage
on Instagram!
Dave Coughlin says
Adjust salt to 1 teaspoon. 1 T way too much…
Barbara Curry says
I like the saltiness, but by all means, adjust the salt to your taste.