

With just three ingredients, it’s no surprise that Rice Krispie treats are a childhood favorite. Magically transform them into Brown Butter Rice Krispie treats with just 1 extra step and create an even better dessert.

There’s nothing quite like the childhood memory of biting into a homemade Rice Krispie treat. They’re now readily available in most groceries and speciality stores, but nothing is quite like a homemade one. If you didn’t think you could improve on the original, I’m here to make your day with Browned Butter Rice Krispie Treats.
Why brown the butter
Adding butter that has been browned creates a nutty aromatic flavor that transforms a traditional Rice Krispie treat and it just takes an extra 2 minutes. I love the way brown butter makes the kitchen smell so incredible, and when added to cookies, blondies, banana bread, cauliflower or cornbread, it boosts the flavor profile.

Warm Up Your Winter: Southern Classics!
FREE EMAIL BONUS: Southern staples made simply & cozy
You might not think that by simply browning the butter it would enhance the taste so much, but the unique flavor makes you want to savor every bite of these little treasures.
Why you’ll love them even more than Rice Krispie treats
- Brown butter makes everything better. If you’ve never tried it, this is the simplest recipe to give that theory a try!
- Each treat is crispy and gooey at the same time
- Bars are easy to freeze
- They ship well even in hot temperatures
What you’ll need

- Rice Krispie cereal – you can use any brand of crispy rice cereal. With your leftover cereal, try them in a S’more bar, or add chocolate and peanut butter, or throw them into some seven layer bars.
- Marshmallows – you’ll need a 10-ounce bag. You can use mini or regular sized. If they’re old, they will not melt as well, so try to use fresh ones. If you want to use marshmallow fluff, they’ll taste the same but won’t be as crispy.
- Butter – unsalted butter works best but you can use salted and just reduce the salt in the recipe, you’ll need a whole stick!
How do you make the Best Rice Krispies Treats
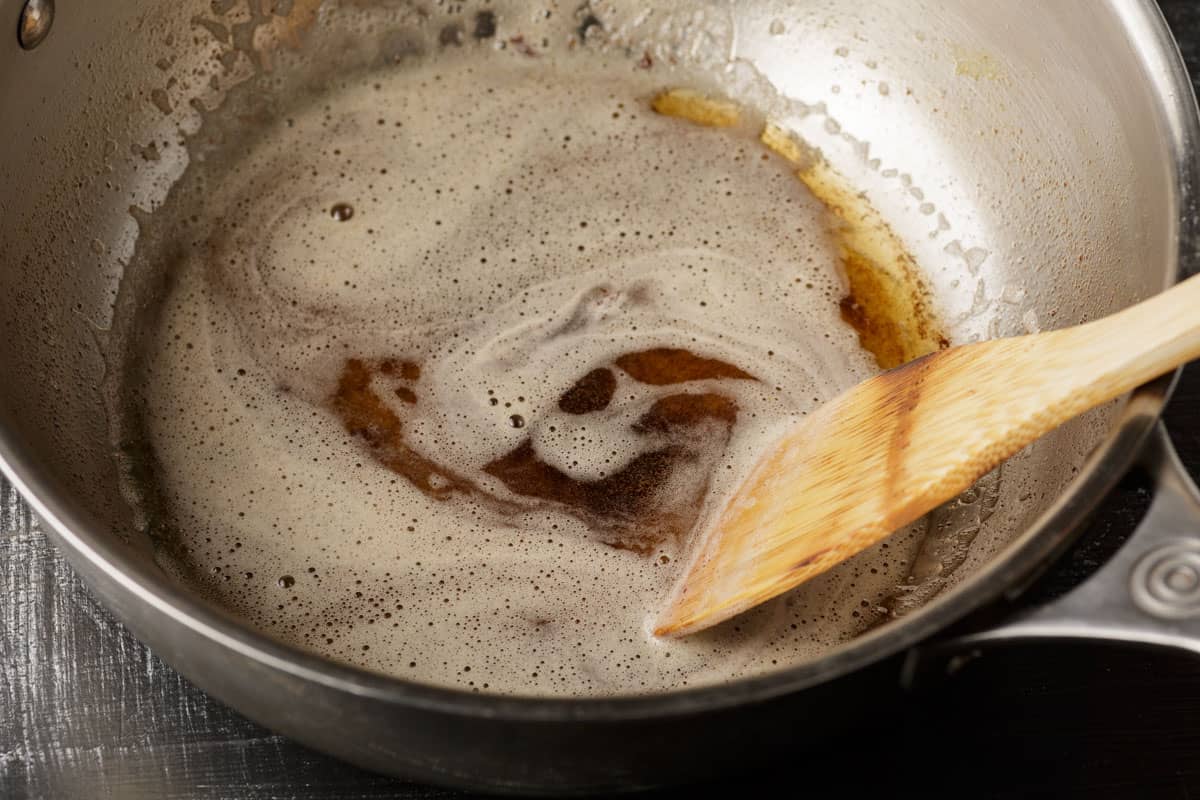
Step 1: brown the butter
The original Rice Krispie treat recipe calls for just 3 tablespoons of melted butter. Instead, we are increasing the butter and rather than just melting it, you’ll let it cook an additional 2 minutes or so until it’s golden brown. This only takes about 2 minutes, during which it will foam and then turn brown. You need to stand over the pan as it can go from brown to burnt in seconds. If you haven’t done this before I have step by step directions and tips to keep brown butter from burning.
Step 2: melt the marshmallows
As soon as the butter starts to turn brown, add the marshmallows and stir until they have completely melted.

Step 3: Combine
Add vanilla and salt and then pour the marshmallow mixture over the Rice Krispies. Quickly stir until the cereal is coated then place in a buttered 8 x 8 inch baking pan.
Pro tip: Use the paper the butter came in to press the mixture into the pan. It will keep your hands clean and the butter will keep the paper from sticking to the treats and if they are still warm, you won’t hurt your fingers. This also allows you to press them into a shape, making them easier to cut into squares.
It will take about 2 hours to come to room temperature and be ready to cut.

A Few Recipe Notes for the Best Rice Krispie Treats
- Be careful not to burn the butter, as soon as it starts to turn brown, add the marshmallows and reduce heat.
- Avoid old marshmallows, they will not melt as well.
- You can use marshmallow fluff but the texture will be different.
- Regular or mini marshmallows both will work.
- If you want to be festive, add some mini M&Ms for the holidays.


How to Store
These can be stored at room temperature in an airtight container or freeze between layers of parchment so they don’t stick together.
If you loved this recipe, give it a star ⭐️⭐️⭐️⭐️⭐️ rating! Also, snap a picture of your finished dish and share it with me on Instagram using the hashtag #butterandbaggage and tagging me @butterandbaggage.

Brown Butter Rice Krispies Treats Recipe
Ingredients
- 10 ounces marshmallows
- ½ cup butter
- 1 teaspoon vanilla
- 6 cups Rice Krispies cereal ½ box
- ½ teaspoon salt
Instructions
- Butter an 8 x 8 inch pan
- Melt the butter in a saucepan over medium heat. Cook until it begins to brown, stirring often, about two minutes. Turn the heat to low and add marshmallows. Stir until smooth.
- Remove from heat and add vanilla and salt, stir to combine. Add Rice Krispies, stirring quickly to combine. Place in prepared dish and with the paper from the stick of butter, flatten it into place, or butter a spatula and use it to form it in the pan.
- Let it cool until room temperature and cut into squares.
Video
Barbara’s Tips + Notes
- Be careful not to burn the butter, as soon as it starts to turn brown, add the marshmallows and reduce heat.
- Avoid old marshmallows, they will not melt as well.
- You can use marshmallow fluff but the texture will be different.
- Regular or mini marshmallows work well
- Freeze between a layer of parchment paper so they don’t stick together.
Nutrition
 Follow Me On SocialDid you make this recipe? Mention @ButterandBaggage or tag #ButterandBaggage
on Instagram!
Follow Me On SocialDid you make this recipe? Mention @ButterandBaggage or tag #ButterandBaggage
on Instagram!
Leave a Reply